1

Topic: Installing CRT Emudriver 2.0 - HD 4350 - Windows 7 - super resolutions

This is a step-by-step guide to help new users with the task of installing CRT Emudriver 2.0 for legacy cards (pre-HD 5xxx). For HD 5xxx and newer cards, check this guide.

The goal of this setup is to connect a TV using the VGA output of a HD 4350 video card. The system will be configured to use super resolutions.

Index:

STEP 1 - Installing the driver
STEP 2 - Creating video modes
STEP 3 - (The adventure of) Unplugging the PC monitor
STEP 4 - Setting MAME up

2

Re: Installing CRT Emudriver 2.0 - HD 4350 - Windows 7 - super resolutions

STEP 1 - INSTALLING THE DRIVER

I will start with a fresh installation of Windows 7 (this is not strictly necessary, but it will make my results fully predictable for the purpose of this guide).

- On the left, a LG SVGA monitor, that I have used all the way through the operating system installation.
- On the right, a Sony KV-M1420E TV, that is the target monitor I want to setup.

http://www.abadiadelcrimen.com/crt/4350/20160105_124145.jpg

Initially my LG monitor is plugged to the DVI-I port of the HD 4350, by means of DVI-VGA adapter.

http://www.abadiadelcrimen.com/crt/4350/20160105_122942.jpg

In Display->Resolution, I check that Windows has detected my LG monitor as StudioWorks77M. Windows gets this information from the monitor's EDID.

http://www.abadiadelcrimen.com/crt/4350/20160105_124239.jpg

Now I'll open the folder with the CRT Emudriver files, and I'll launch Setup. The installer dialog shows one compatible device, that is already checked. My video card appears as ATI Radeon HD 4350, by Microsoft Corporation, which means that this driver was shipped with the Windows 7 CD. I won't uninstall this driver. Instead, I'll click on Install driver.

http://www.abadiadelcrimen.com/crt/4350/20160105_124317.jpg

The installer will ask me to enable TESTSIGNING. This step is required in order to run modified drivers. I'll click on Accept. Now the installer will ask me to restart the system so TESTSIGNING is applied. It will prompt an error saying it can't continue installation. So I'll RESTART.

http://www.abadiadelcrimen.com/crt/4350/20160105_124343.jpg

After restart, I notice there's a watermark saying Test Mode on the right bottom corner of the desktop. Now we can proceed with the installation.

http://www.abadiadelcrimen.com/crt/4350/20160105_124732.jpg

I launch Setup again and click on Install driver. Now the installer asks me to add "Calamity" as a trusted publisher. This is required so Windows accepts my signature and allows modified drivers to be actually loaded during boot. I click on Accept.

http://www.abadiadelcrimen.com/crt/4350/20160105_124819.jpg

The driver installation begins, the screen goes on and off a few times while the new files are loaded. After a minute, the installer says the drivers got installed succesfully.

http://www.abadiadelcrimen.com/crt/4350/20160105_124830.jpg

Now my card is shown as Ati Radeon HD 4300/4500 Series, and the driver name is CRT Emudriver.

http://www.abadiadelcrimen.com/crt/4350/20160105_124941.jpg

Let's check Display->Resolution. Windows has found a second monitor in my system. This is due to CRT Emudriver's forced monitor detection feature.

http://www.abadiadelcrimen.com/crt/4350/20160105_125128.jpg

I click on the screen number 2 icon and see that Windows shows this phantom screen as "Generic non-PnP monitor". This name means that although we have forced Windows into detecting  a monitor on the VGA port, no EDID has been read from that port, so the monitor type is unknown.

http://www.abadiadelcrimen.com/crt/4350/20160105_125252.jpg

3

Re: Installing CRT Emudriver 2.0 - HD 4350 - Windows 7 - super resolutions

STEP 2 - CREATING VIDEO MODES

In the previous steps, I noticed that the fake screen number 2 resolution is 1024x768. This resolution is certainly out of range for my TV. Even if I managed to set a resolution like 640x480, its frequency would be 31 kHz, the driver's default.

I order to plug my TV, first I need to create some video modes with the right frequency (15 kHz). I'll launch VMMaker for this. If everything is ok with my installation, VMMaker will recognize the driver and be ready to add modes.

http://www.abadiadelcrimen.com/crt/4350/20160105_125347.jpg
I click on the Settings icon.

In the Monitor settings tab, I check that the "Generic 15kHz" preset is selected. This will be good enough by now, I'll have time to tune it when everything is up and running.

Then I go to the User modes tab. I make sure that default "user_modes.ini" file is selected. It is important not to use super resolutions until yo have your monitor properly configured.

In the MAME tab, I'm only going to browse to my GroovyMAME folder, but I won't be listing modes from XML by now. What I'll do is to check "Export settings to GroovyMAME", so future monitor settings will be synchronized with VMMaker.

http://www.abadiadelcrimen.com/crt/4350/20160105_125524.jpg

In the Video card tab, I'll make sure that "Extend desktop automatically on display restart" is checked. This is important: it will extend the desktop at the time the modes are installed, and force 640x480 on the secondary display.

Click OK to accept these settings.

http://www.abadiadelcrimen.com/crt/4350/20160105_125616.jpg

Now back on the main dialog, I click on Generate modes. A mode list will be generated in an instant.

http://www.abadiadelcrimen.com/crt/4350/20160105_125634.jpg

Finally, I click on Install modes. It will ask me if I'm sure, I'll answer yes. Now the system will get frozen during a few seconds, while the video card is restarted. The screen will go off too for an instant. Once back, if everything went fine, the new modes will be ready.

http://www.abadiadelcrimen.com/crt/4350/20160105_125741.jpg

I check in Display->Resolution, and make sure the resolution has been set to 640x480, on monitor 2.

http://www.abadiadelcrimen.com/crt/4350/20160105_125808.jpg

Time to plug the VGA cable that goes to the UMSA in the VGA port (black cable).

http://www.abadiadelcrimen.com/crt/4350/20160105_125833.jpg

I switch my Sony on, an there it is: I have a clear picture on it.

http://www.abadiadelcrimen.com/crt/4350/20160105_125907.jpg

4

Re: Installing CRT Emudriver 2.0 - HD 4350 - Windows 7 - super resolutions

STEP 3 - (THE ADVENTURE OF) UNPLUGGING THE PC MONITOR

In the previous step I ended up with a fully working extended desktop, which is totally fine if what I wanted was to keep both monitors attached all the time. But because my aim is to get rid of the PC monitor, I need to figure out a way to unplug it without leaving my setup in an unusable state. Follow me close here, this is the trickiest part.

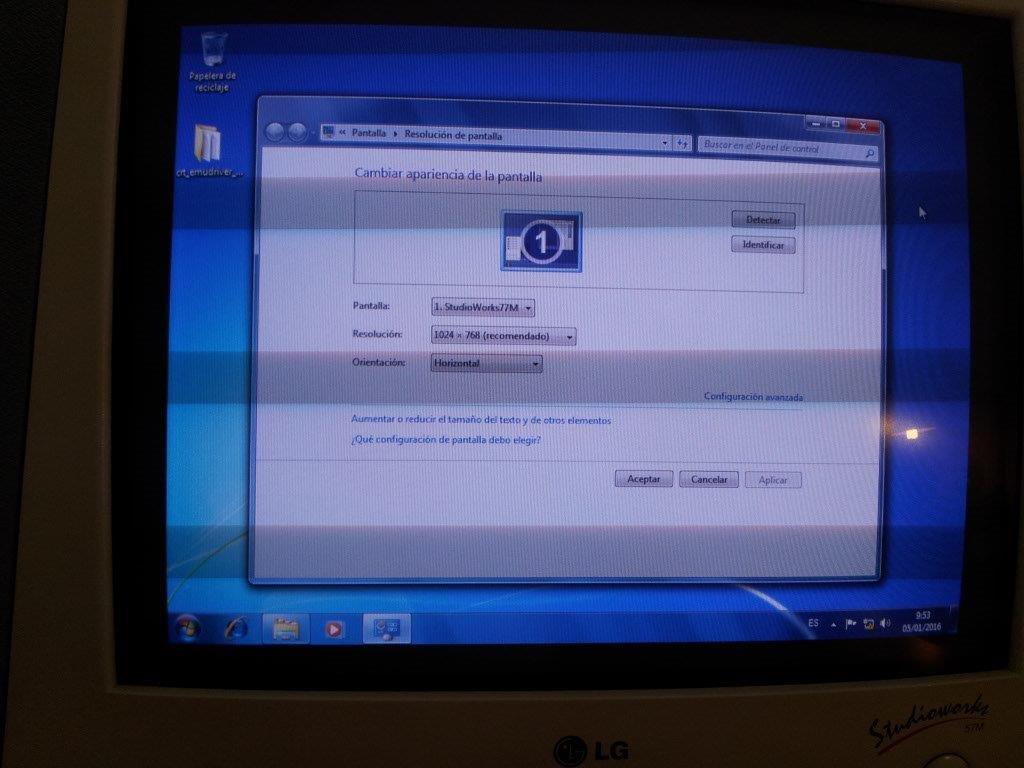
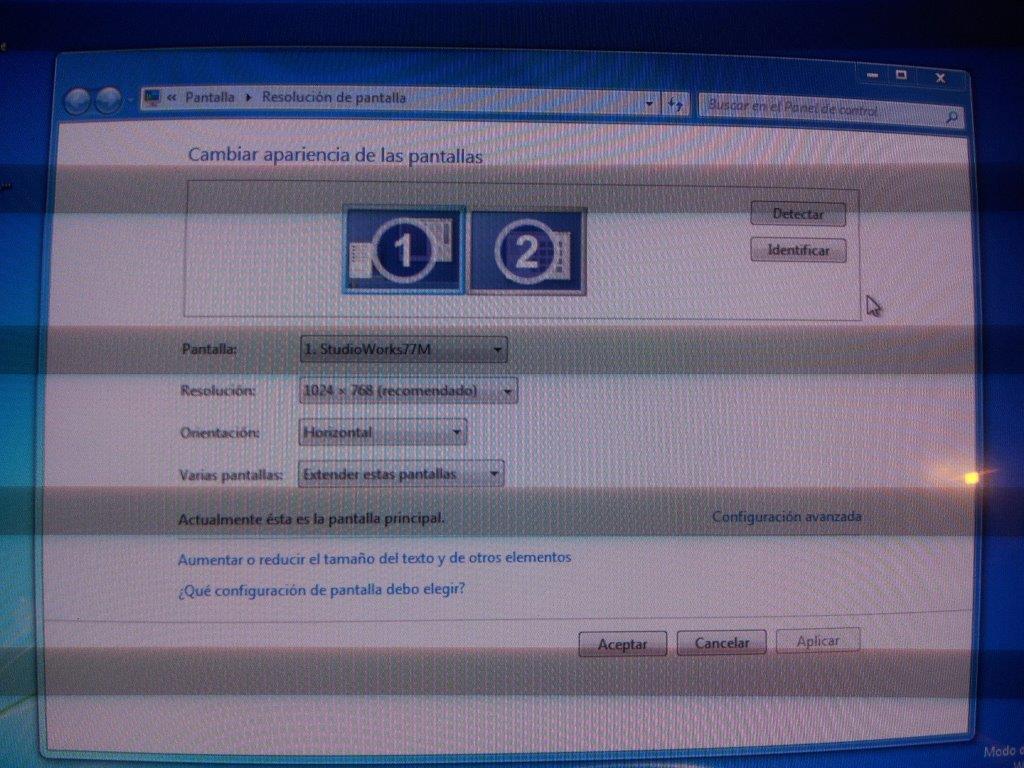
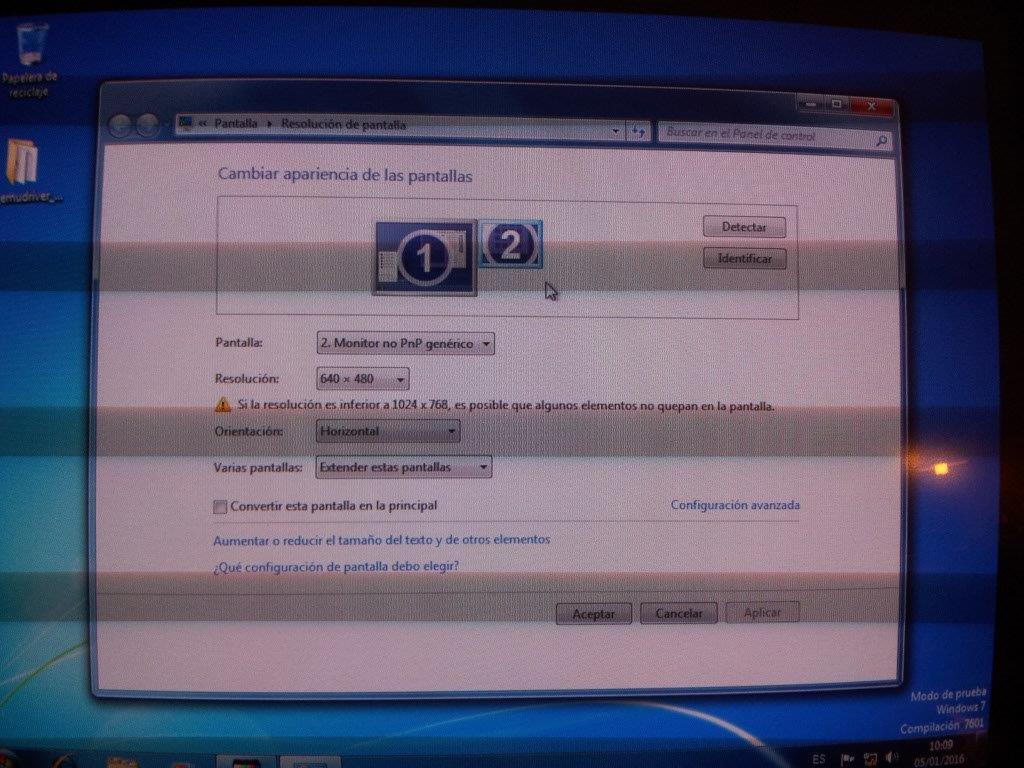
First, go to Display->Screen Resolution, select the monitor number 2, and click on "Make this my main display".

http://www.abadiadelcrimen.com/crt/4350/20160105_130030.jpg

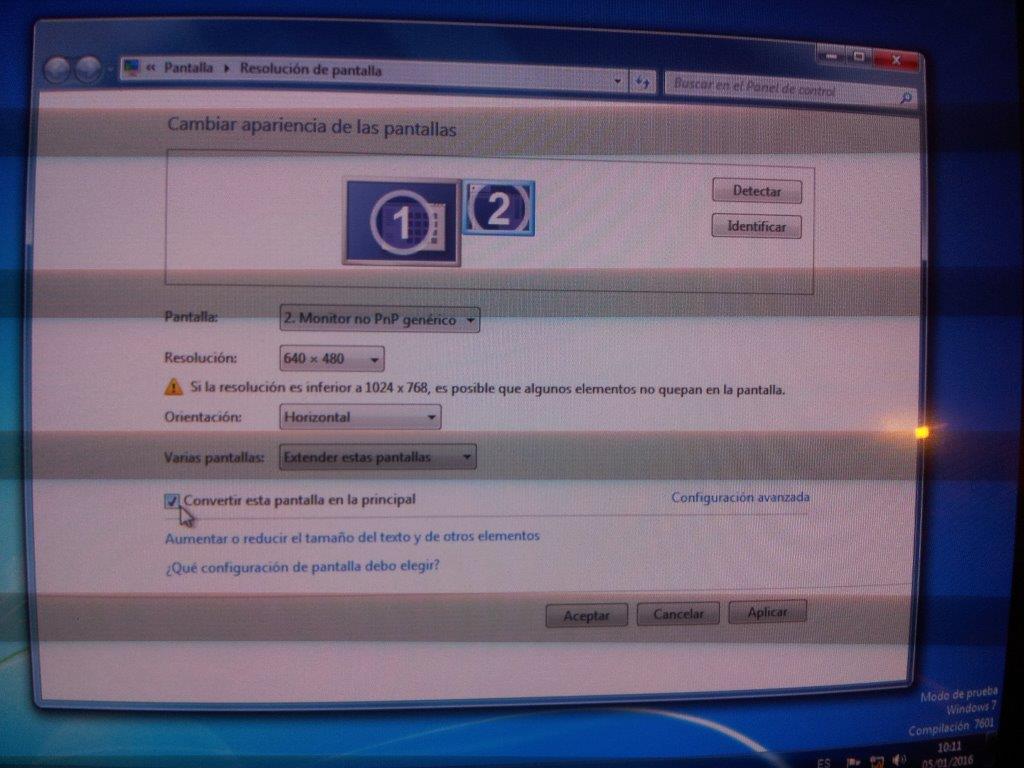
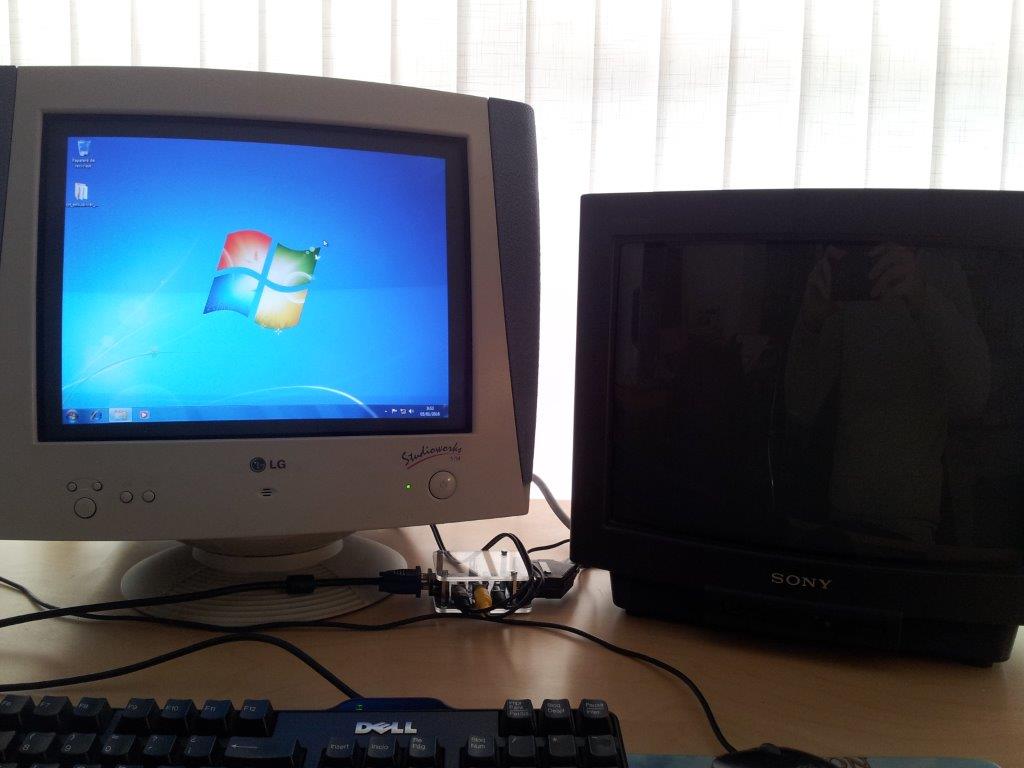
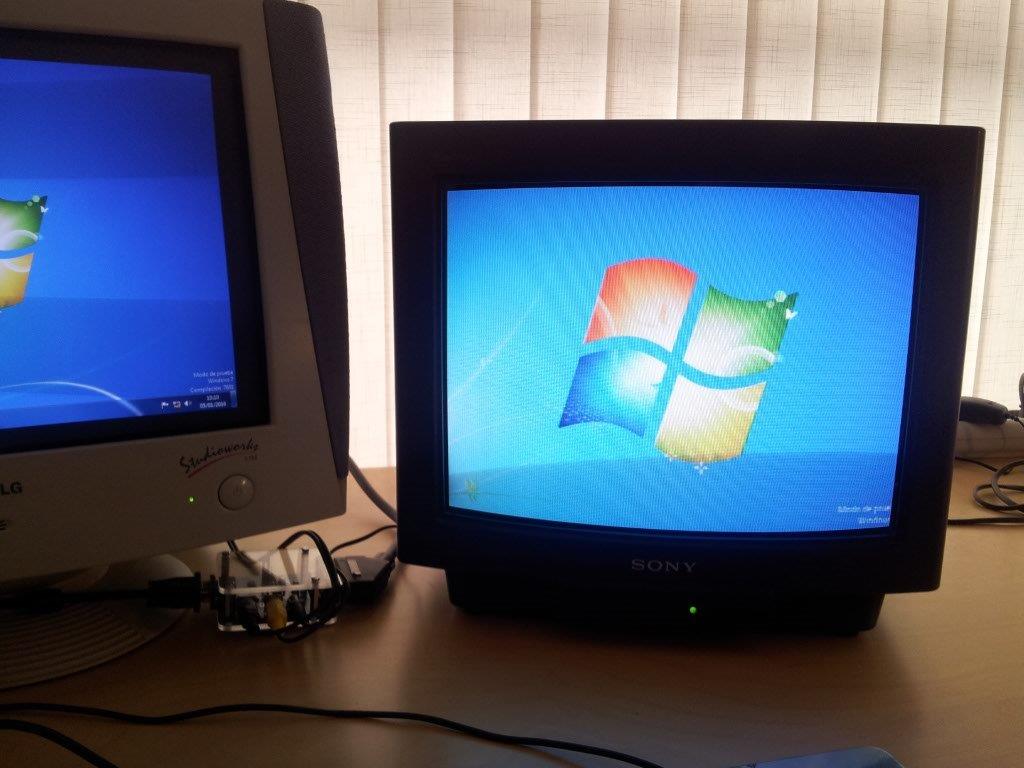
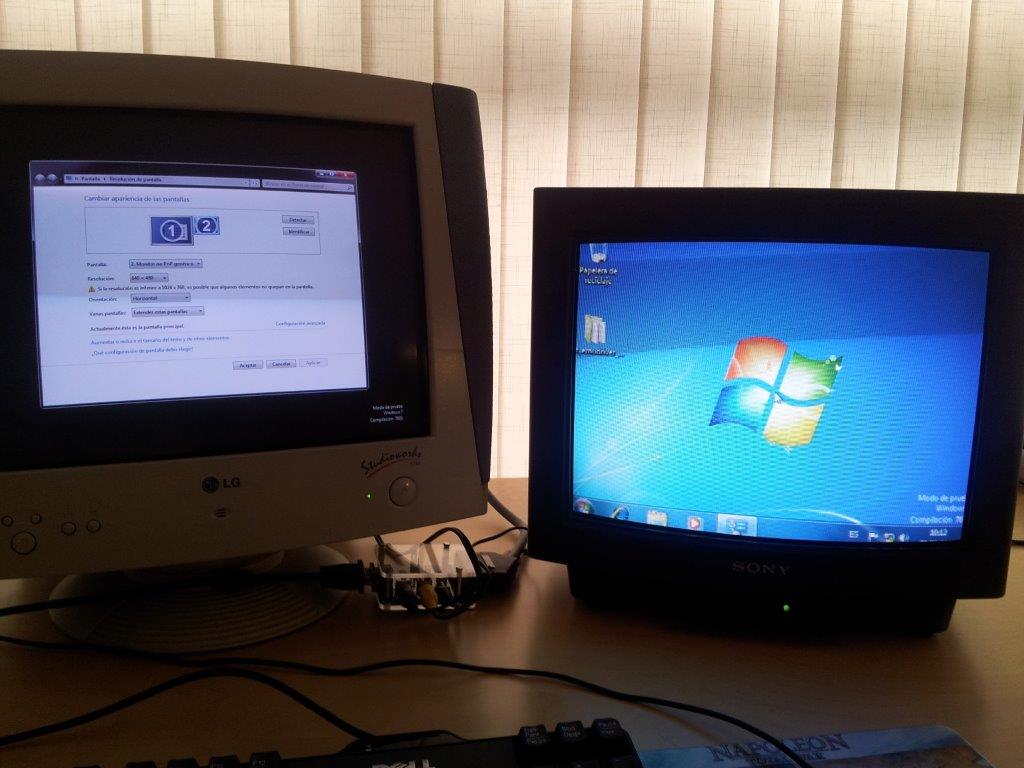
Click on Apply, and after a second the desktop will show up on the TV screen. The dialog will still be placed on the PC monitor, so drag and drop it on the TV.

http://www.abadiadelcrimen.com/crt/4350/20160105_130045.jpg

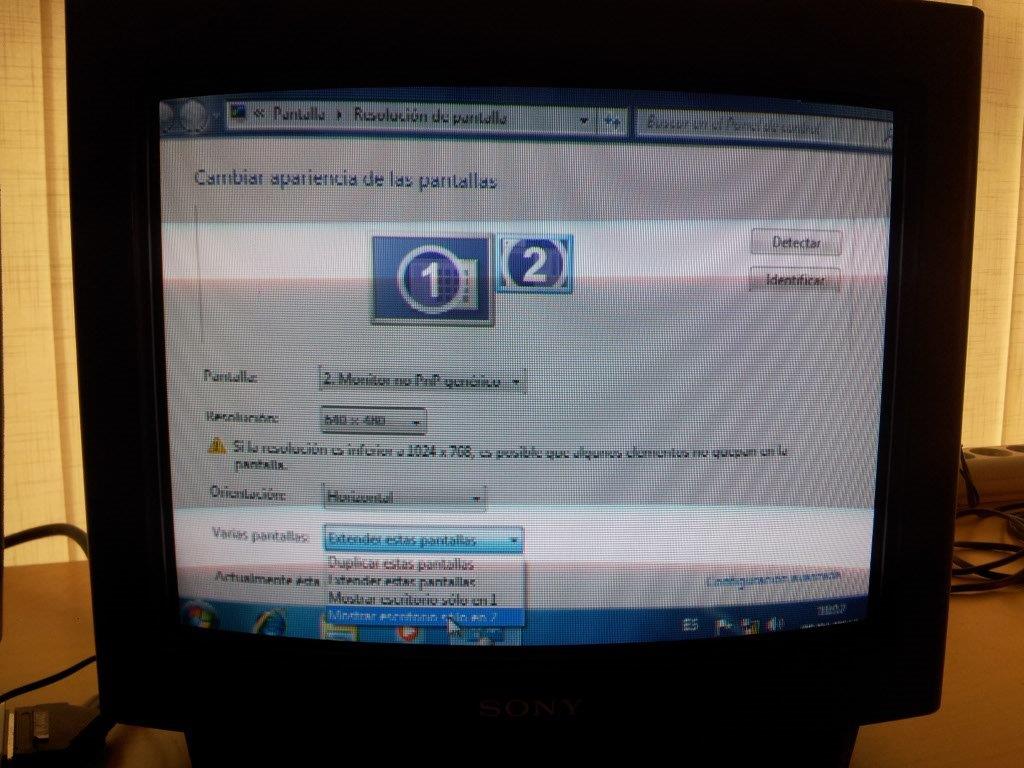
Now that we have the good stuff on the TV, it's time to remove the desktop from the PC monitor. Still in Display->Screen Resolution I go to the "Multiple displays" pull-down menu and select "Show desktop only on 2". Click Apply.

The PC screen will turn black, and so will do its icon in the display dialog.

http://www.abadiadelcrimen.com/crt/4350/20160105_130117.jpg

Let's unplug the PC monitor. Now only the TV is connected.

http://www.abadiadelcrimen.com/crt/4350/20160105_130229.jpg

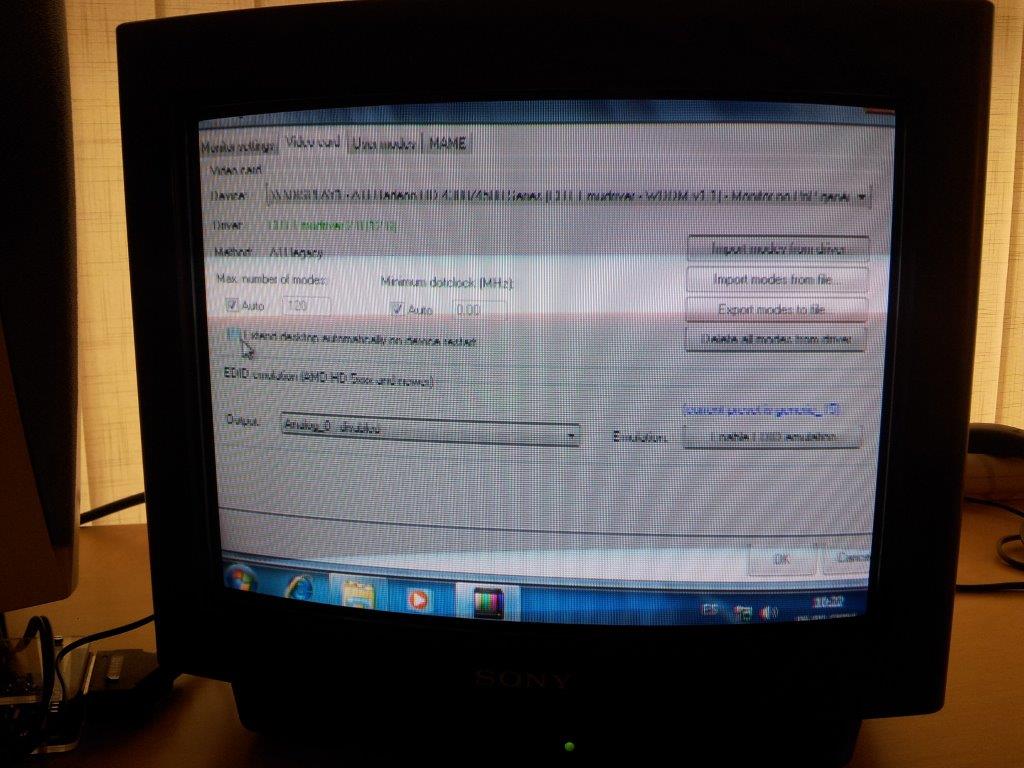
This step is vital. I must force Windows to detect the new situation, and memorize it. And I want it to happen now when I have the control, not later at boot time. To do this, click on Detect.

http://www.abadiadelcrimen.com/crt/4350/20160105_130200.jpg

OOPS! The main desktop is gone! I'm back on the secondary desktop. Don't panic.

http://www.abadiadelcrimen.com/crt/4350/20160105_130309.jpg

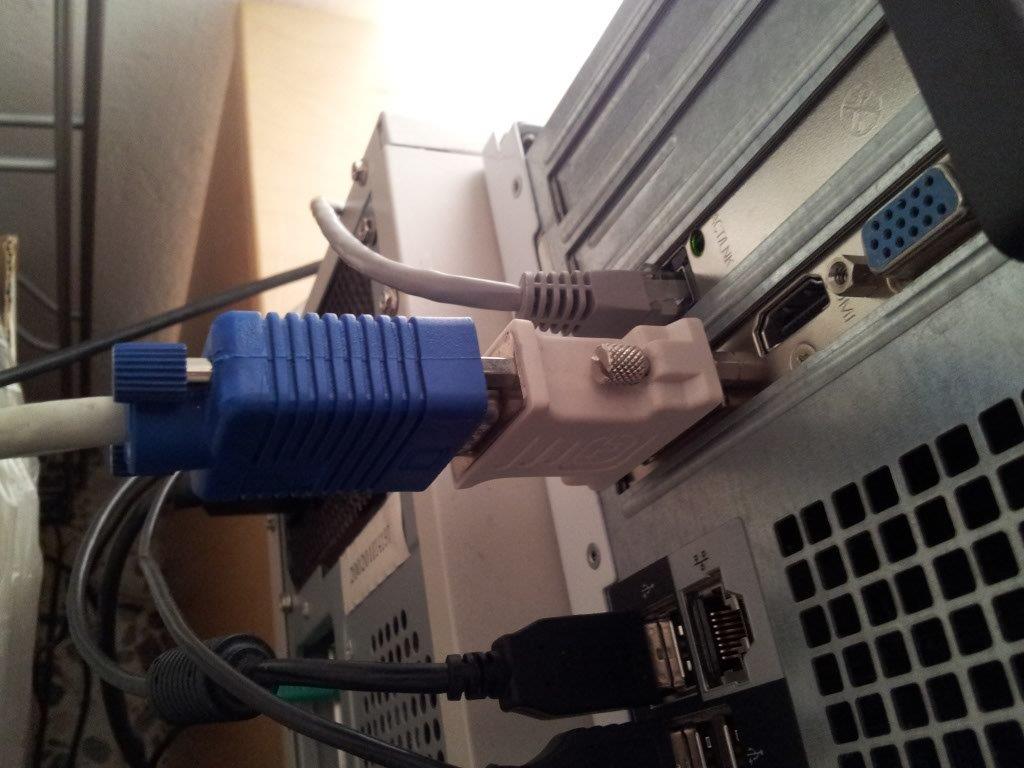
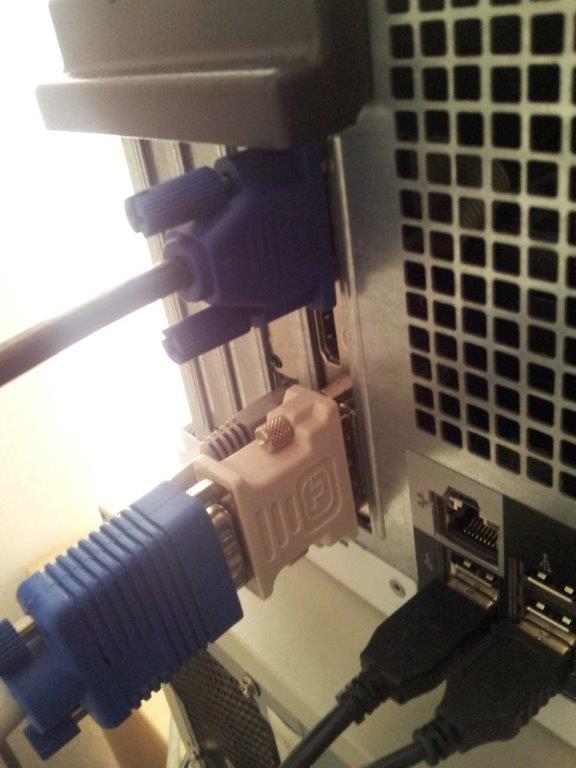
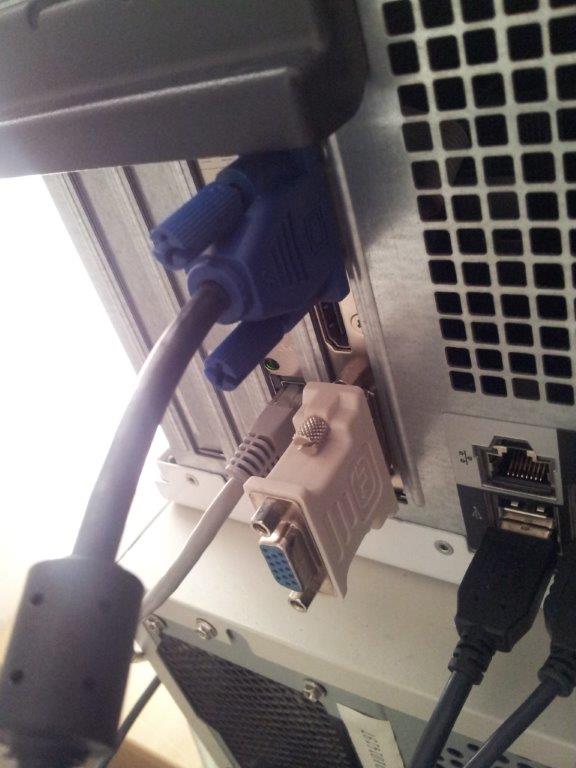
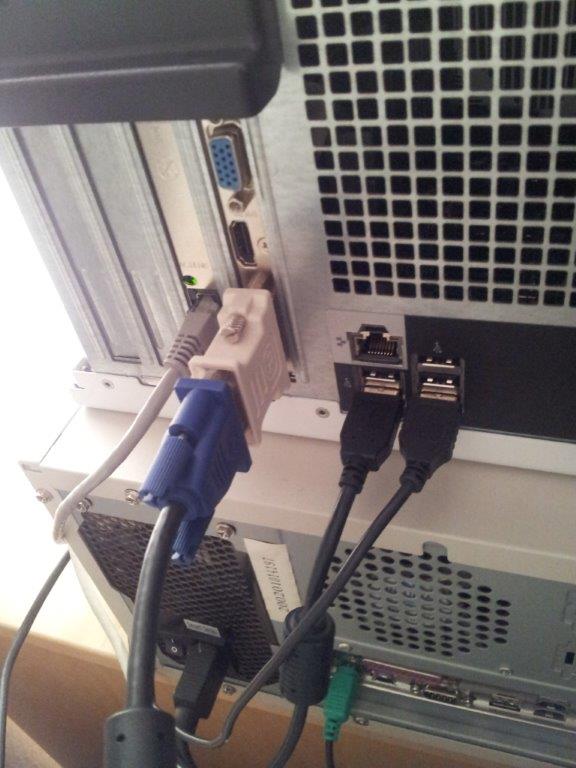
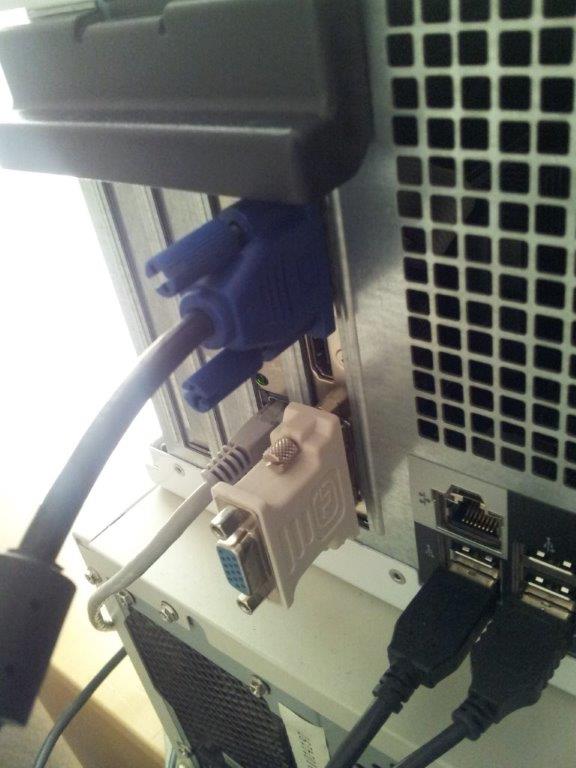
I know that the main desktop must be on the other output. So I simply remove the cable from the VGA and plug the *same* cable in the DVI-I port.

http://www.abadiadelcrimen.com/crt/4350/20160105_130331.jpg

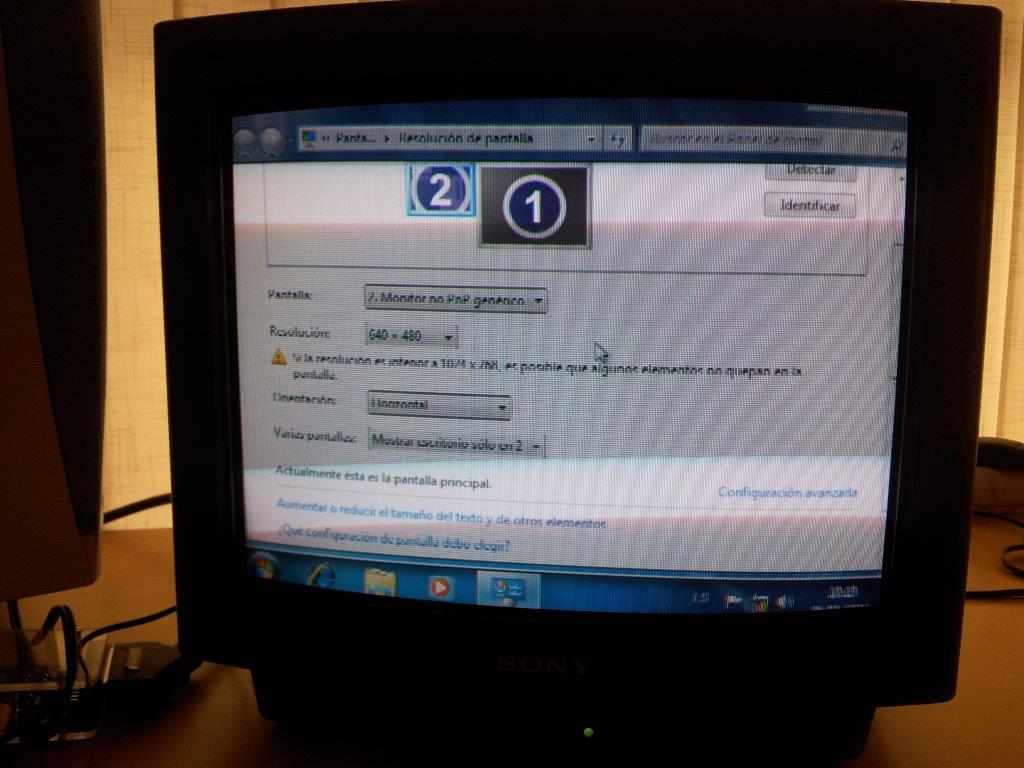
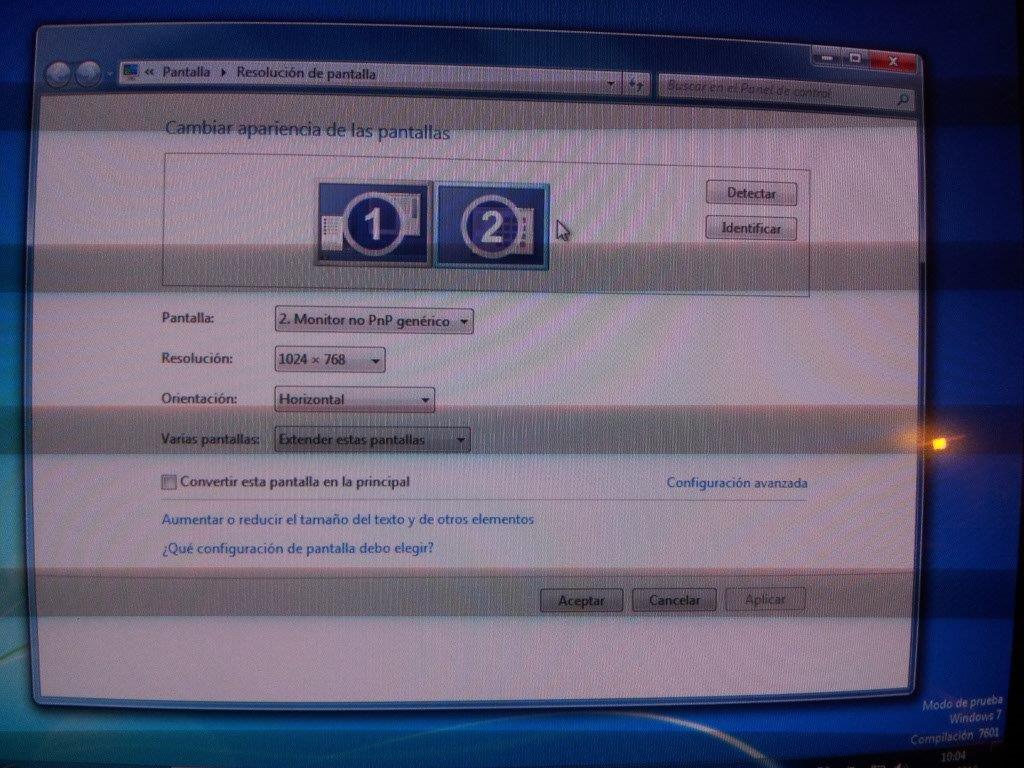
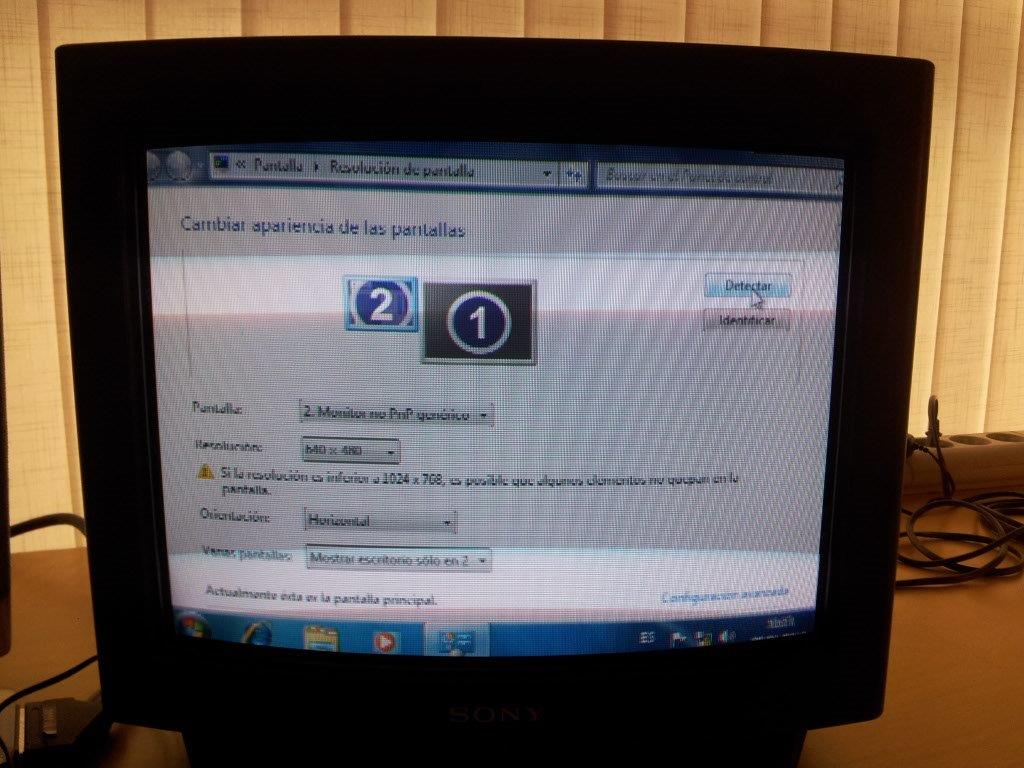
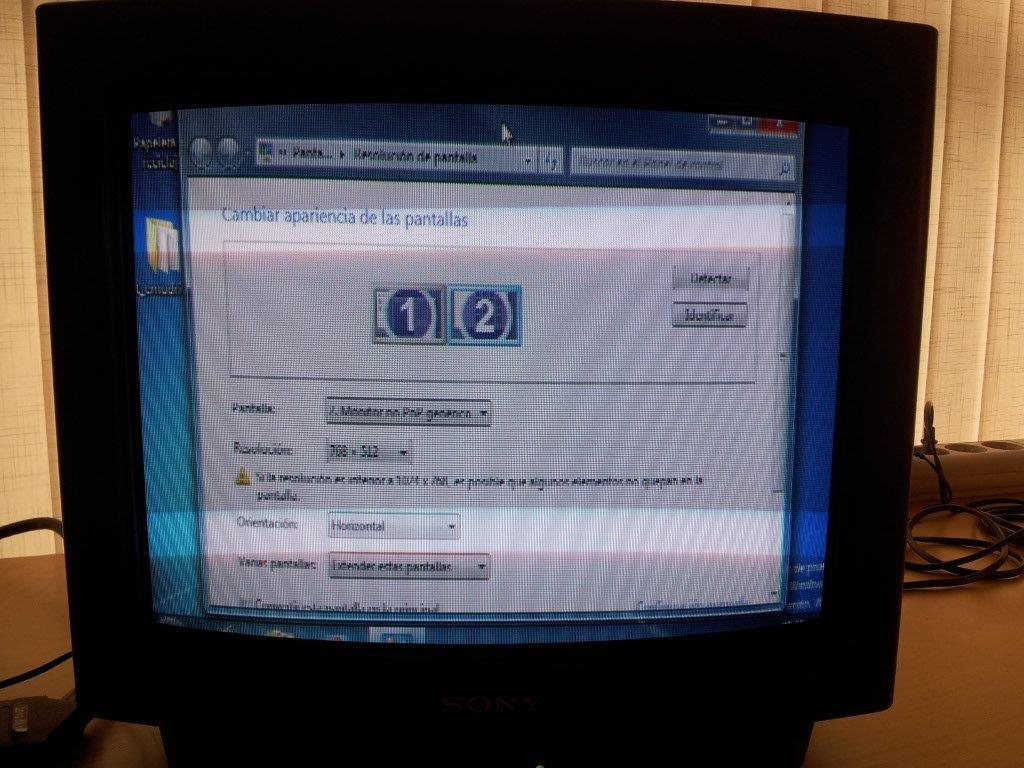
There it is. Now, pay attention for a moment to what's displayed in the dialog. Remind I had clicked on Detect? Because of the forced monitor detection feature, now I see two monitors detected, but this time instead of my LG, I have two "Generic non-PnP monitor" displays.

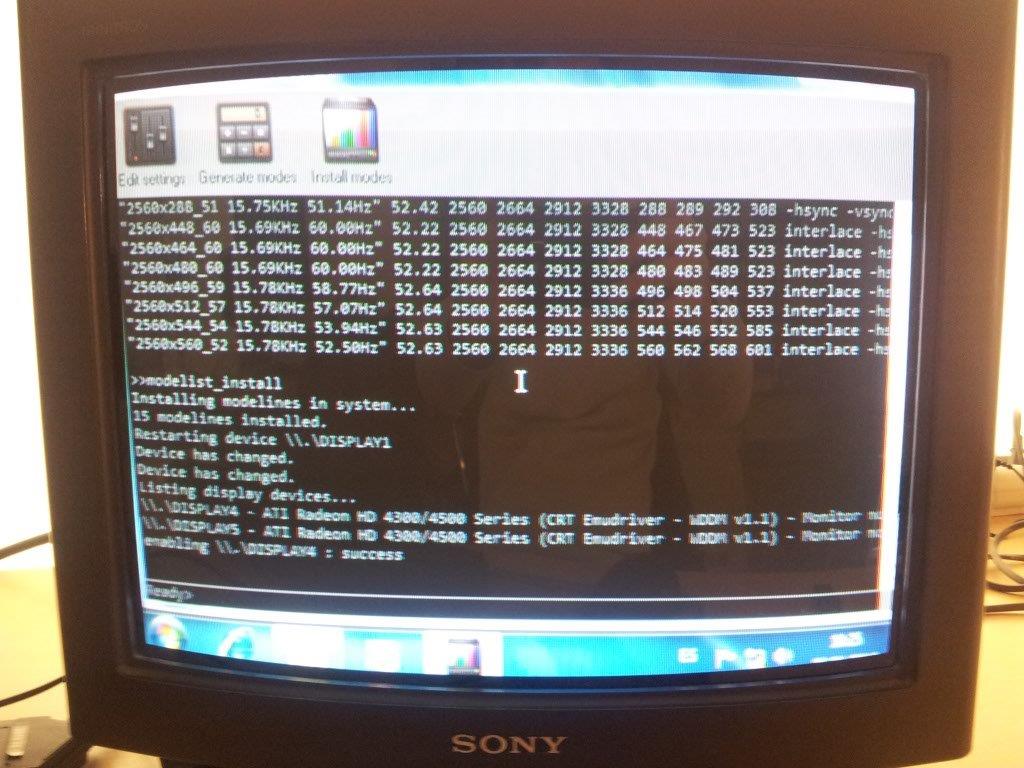
The interesting part is that both monitors have been set to 768x512. Why? Because this is the highest resolution available in the mode list we previously installed with VMMaker. When Windows detects a new display configuration, it automatically tries to make the best arrangement, and by best it assumes the higher resolution. You see why we must not install super resolutions at the
beginning: if we do, Windows would now have chosen 2560 x whatever and our display layout would be screwed.

http://www.abadiadelcrimen.com/crt/4350/20160105_130404.jpg

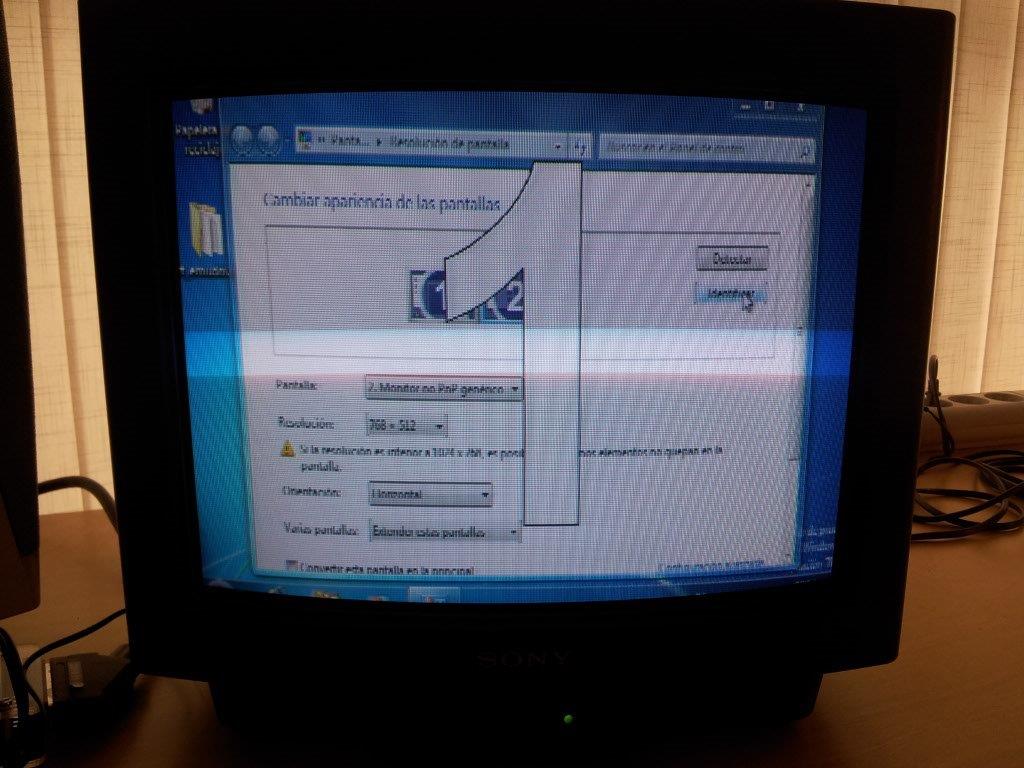
Ok, I'm about to turn one of the desktops off, but I'm a bit confused as to which one represents now the DVI-I output (the one I want off). I click on Identify, and I see a big "1". Because I want to have the cable on the VGA output, this means that it's monitor 2 the one I want to preserve.

http://www.abadiadelcrimen.com/crt/4350/20160105_130549.jpg

We've nearly there. I go back to the "Multiple displays" pull-down menu and select "Show desktop only on 2". Before clicking Apply, make sure to read the few next steps below because you have to be FAST, you'll only have a few seconds to do the job.

Click Apply.

http://www.abadiadelcrimen.com/crt/4350/20160105_130623.jpg

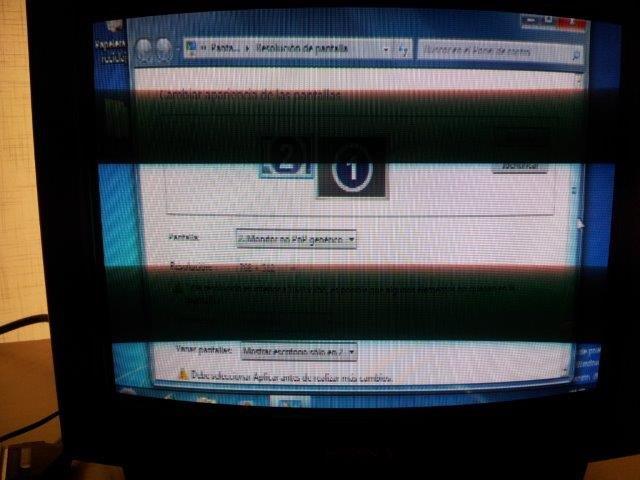
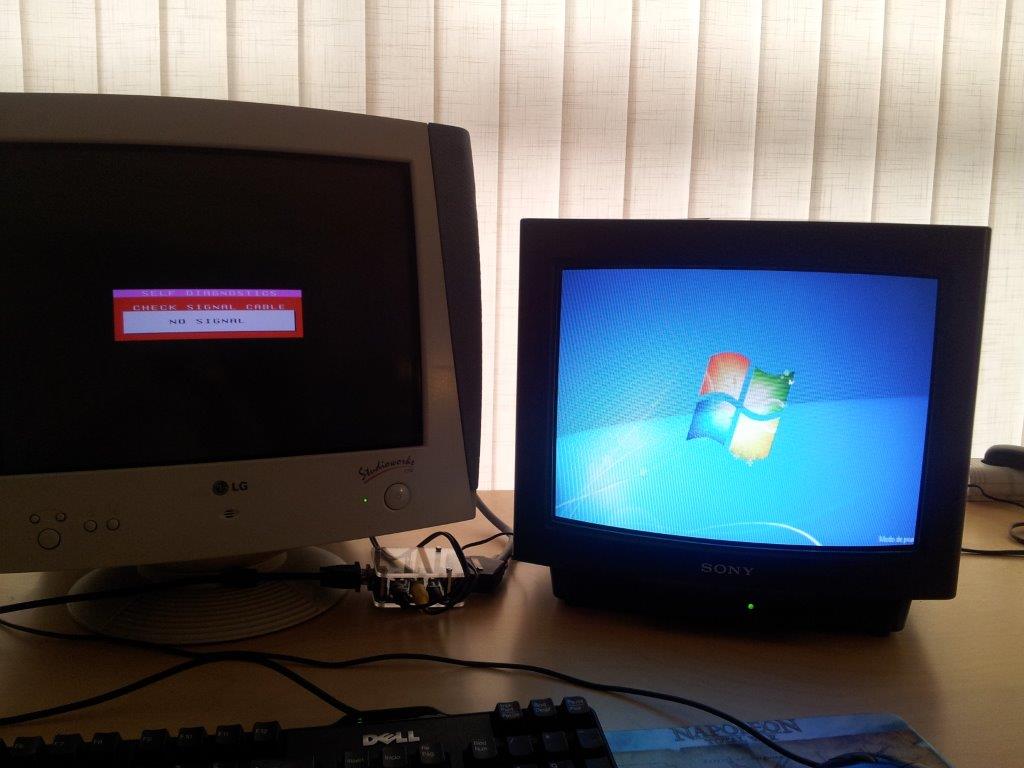
Now, fast, fast, fast, switch the cable back to the VGA output.

http://www.abadiadelcrimen.com/crt/4350/20160105_130759.jpg

You'll see the dialog asking if you want to keep changes. Click on Keep changes. Click Accept.

We got it. Now RESTART the system, not strictly necessary, but it'll be a good check that our settings are persistent after boot.

http://www.abadiadelcrimen.com/crt/4350/20160105_130810.jpg

5

Re: Installing CRT Emudriver 2.0 - HD 4350 - Windows 7 - super resolutions

STEP 4 - SETTING MAME UP

I assume you already have GroovyMAME into a folder, with its mame.ini properly generated and correct rom paths.

Let's launch VMMaker again. The first thing I need to do uncheck "Extend desktop automatically on device restart". I don't want VMMaker to accidentaly extend the desktop again after what I've gone through.

http://www.abadiadelcrimen.com/crt/4350/20160105_131128.jpg

Now let's install super resolutions. We do that in the "User modes" tab, browsing to the "user_modes_super.ini" file.

Click Ok to apply changes.

http://www.abadiadelcrimen.com/crt/4350/20160105_131301.jpg

Click on Generate modes.

http://www.abadiadelcrimen.com/crt/4350/20160105_131322.jpg

Click on Install modes.

Done.

http://www.abadiadelcrimen.com/crt/4350/20160105_131348.jpg

Let's try GroovyMAME. Open a cmd box with Administrator rights. GroovyMAME requires administrator rights for updating video timings when using legacy cards.

http://www.abadiadelcrimen.com/crt/4350/20160105_131414.jpg

mame64 toki

http://www.abadiadelcrimen.com/crt/4350/20160105_131538.jpg

It's lame to remove the information screens.

http://www.abadiadelcrimen.com/crt/4350/20160105_131653.jpg

Enjoy.

http://www.abadiadelcrimen.com/crt/4350/20160105_131715.jpg

6

Re: Installing CRT Emudriver 2.0 - HD 4350 - Windows 7 - super resolutions

-- Placeholder --